


You know those little projects that quietly drive you crazy for years, but you keep ignoring them because they’re just… up there? Literally?
That was our attic door our first year of living in our house.

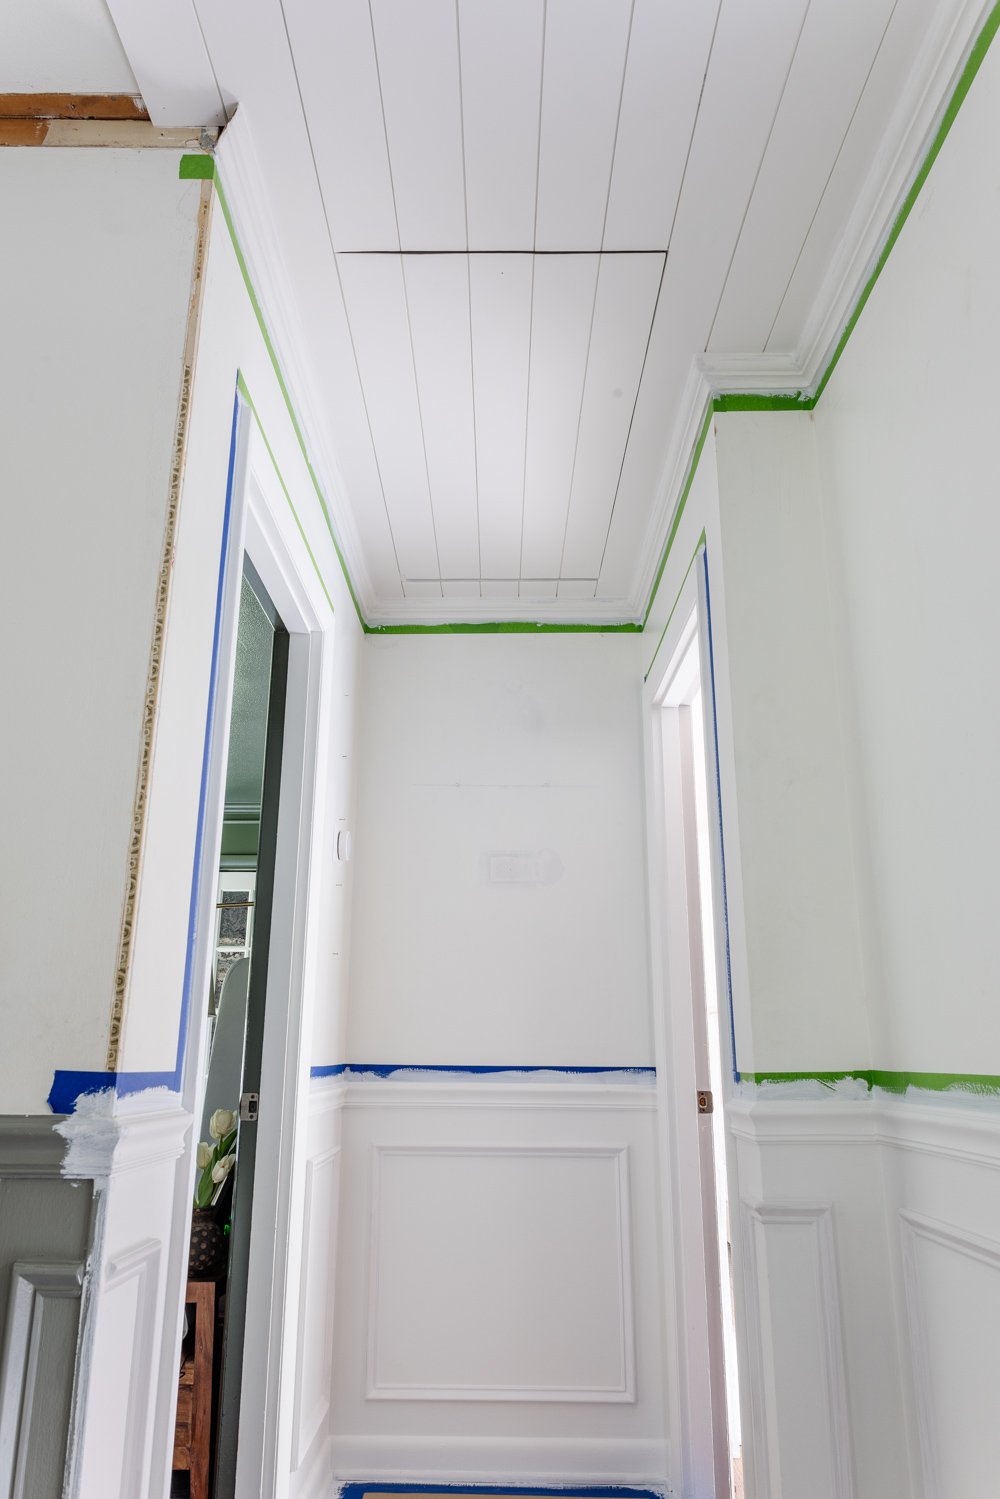
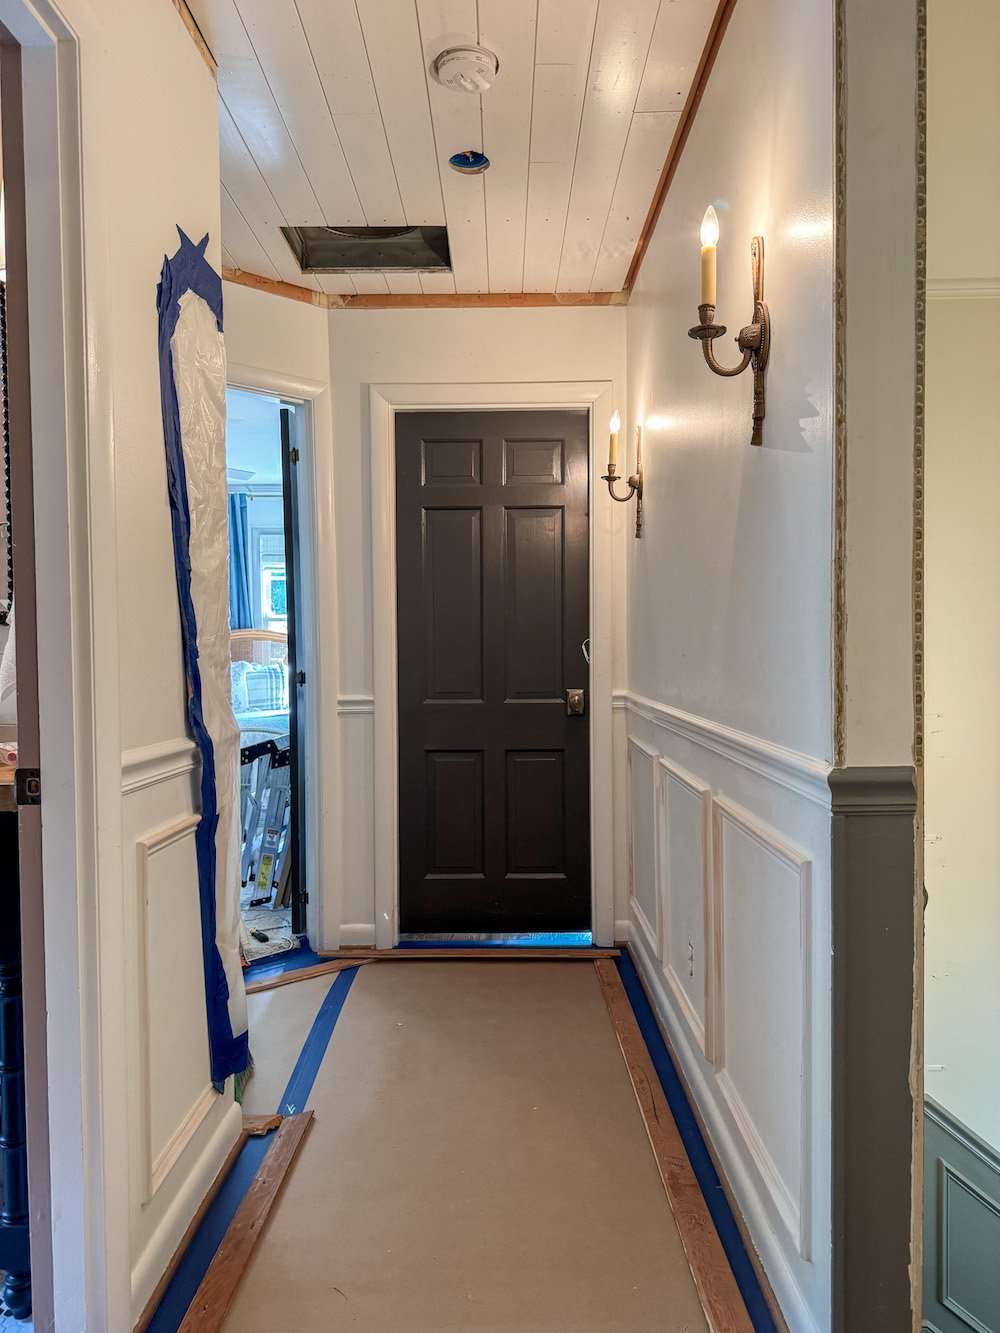
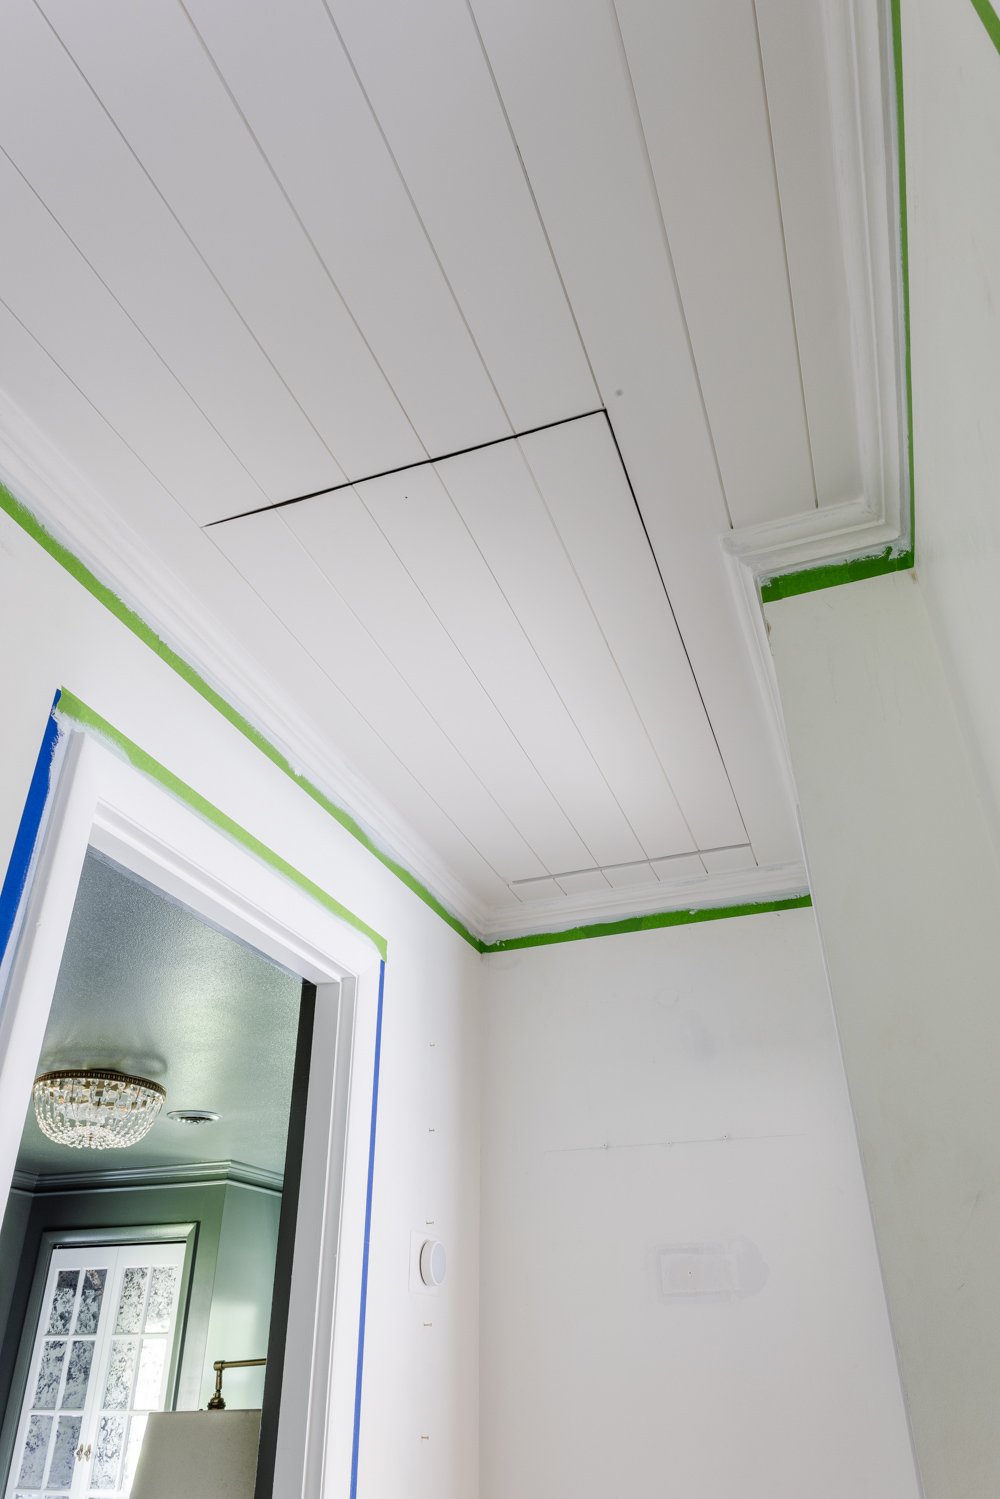
And here it is now. Can you see it? (Pay no mind to the painter’s tape. We’re still getting there.)
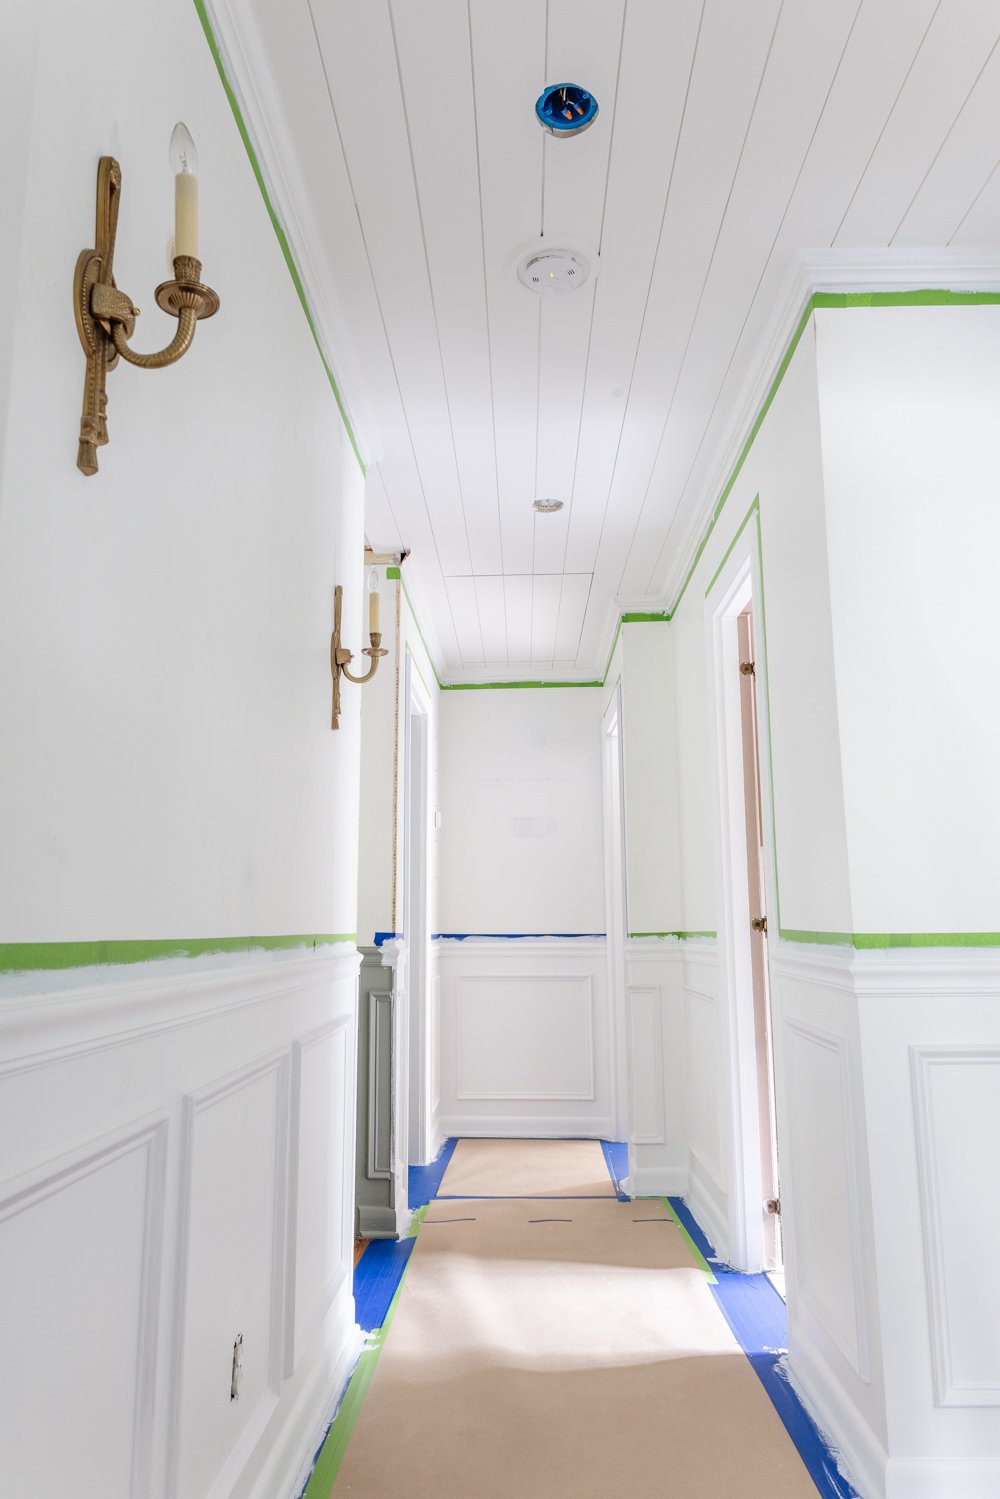
Ever since we moved into this house, I’ve been at war with the ceiling in our upstairs hallway. Between the old attic fan, an old crusty vent, and the oh-so-charming tattered attic door string, it had all been begging for an upgrade for years.
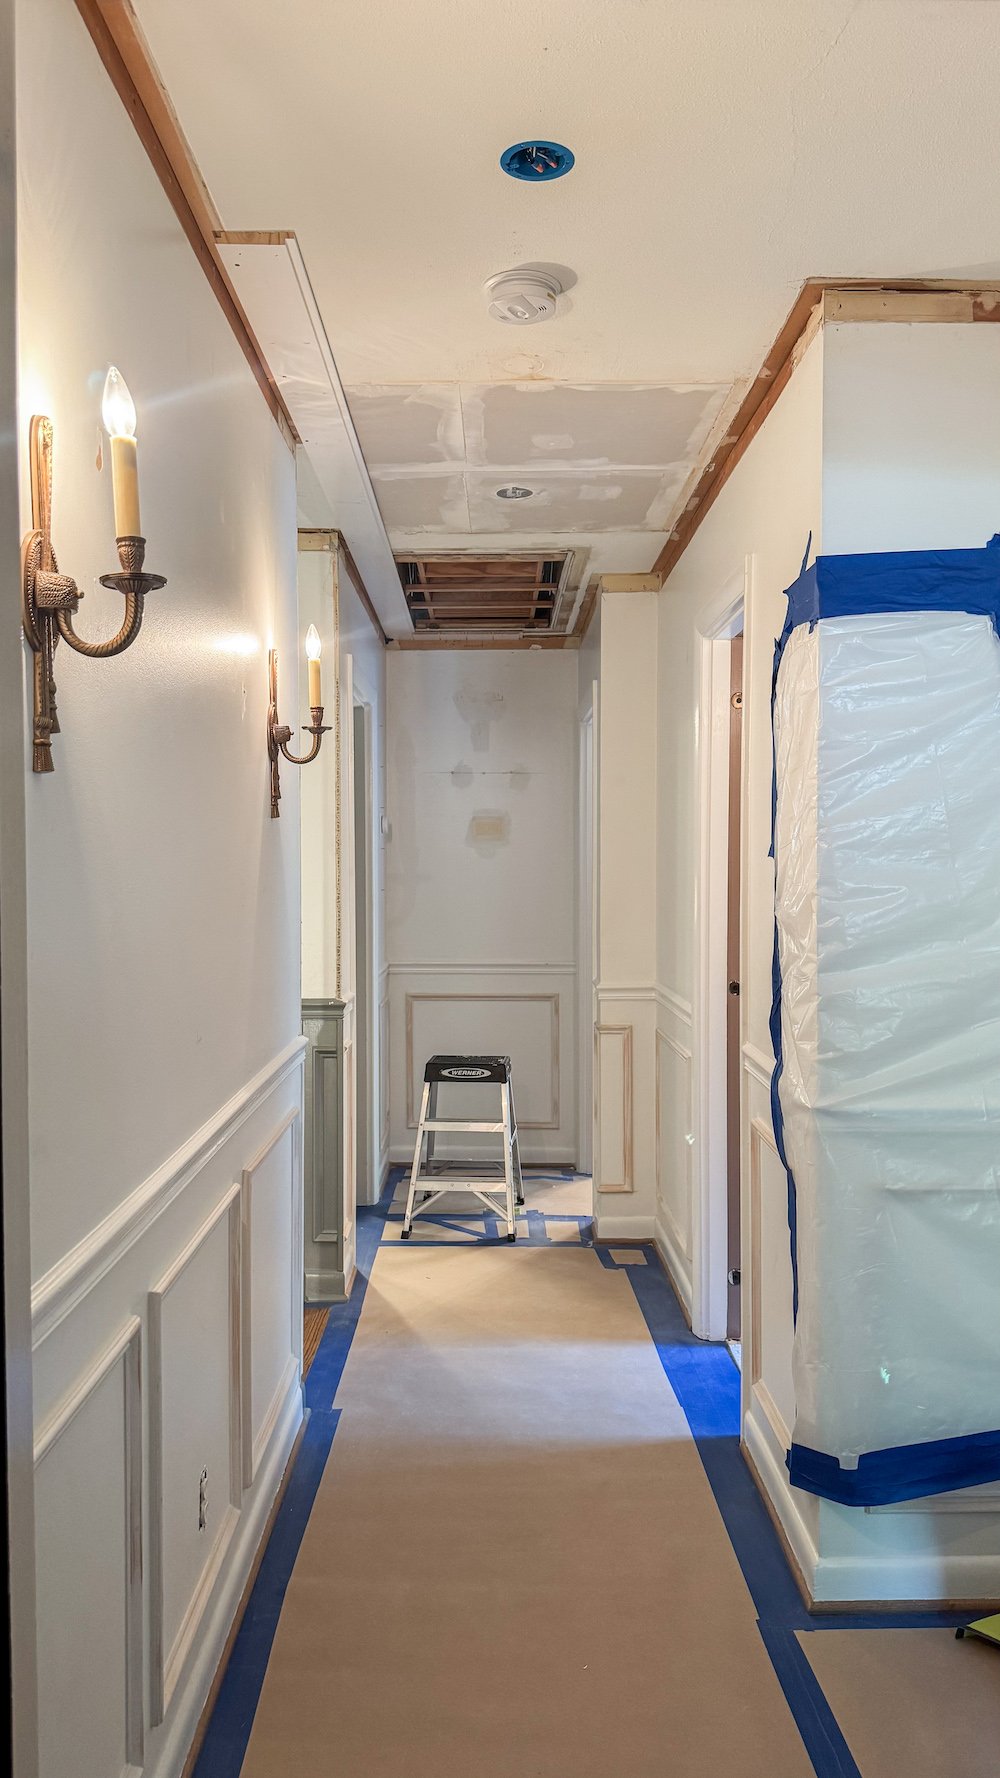
It gets worse before it gets better, but this hallway will look completely different after we paint it to have contrasting trim and wainscoting.

Now that we’re deep into our hallway makeover, I finally had the motivation to tackle one of our biggest goals in this space: hiding that attic door in the ceiling and smoothing out all the visual clutter.
We already patched over the old attic fan (good riddance). And the next mission? Make that attic door disappear while adding a layer of charm to the space in the process.
Enter: the tongue and groove ceiling.
Not only did this project solve our “how to hide attic door in ceiling” problem, but it also gave our hallway a cottage-core glow up that I can’t stop swooning over.
Here’s how we did it, step-by-step:
How to Hide an Attic Door in the Ceiling with Tongue and Groove Planks
As an Amazon Associate, I earn from qualifying purchases. Full disclosure
Tools & Materials
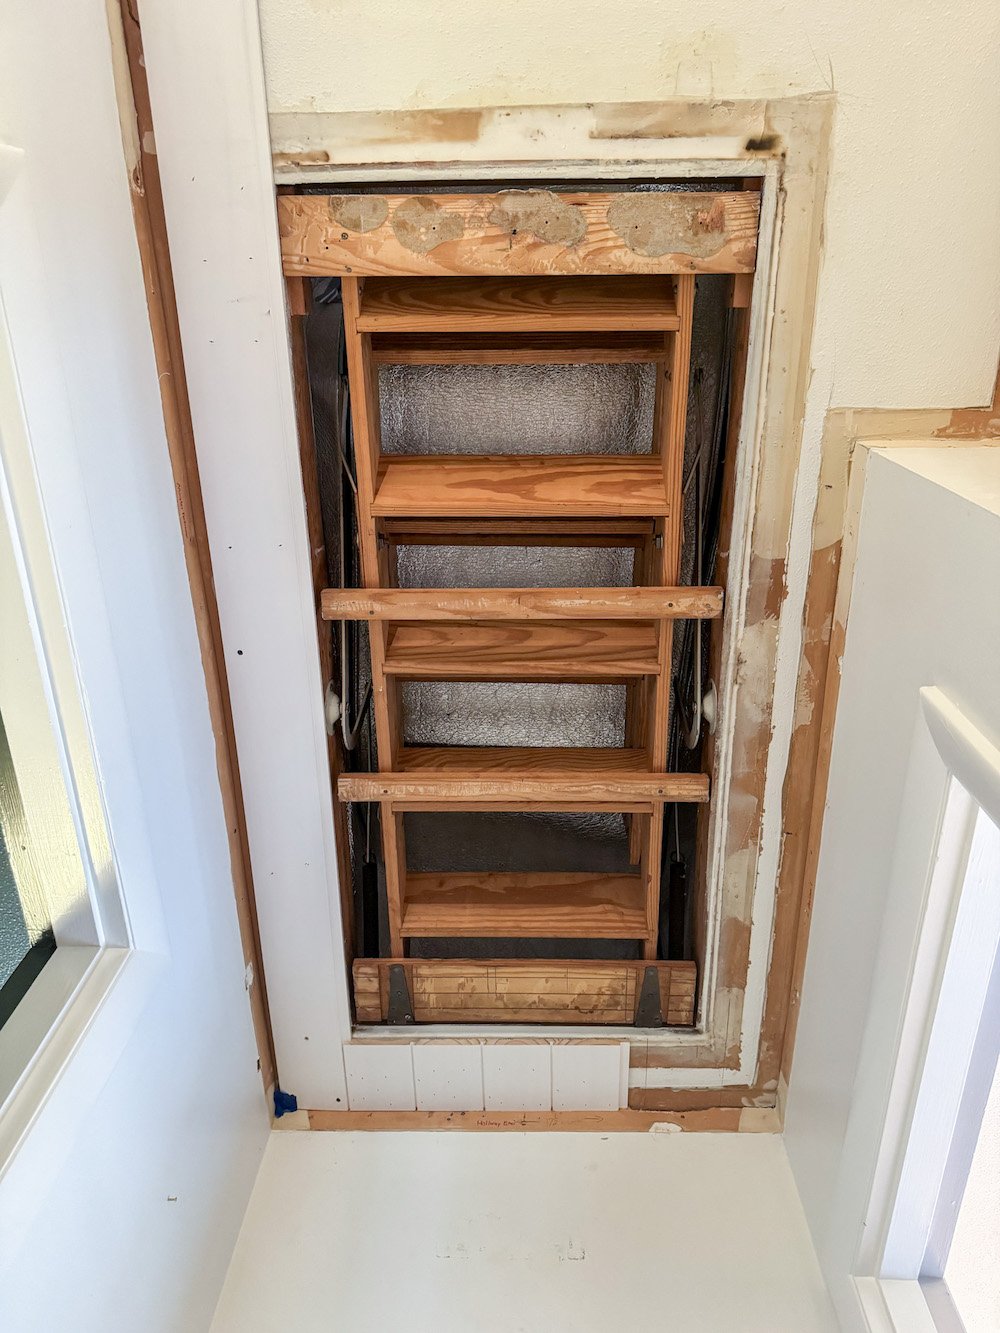
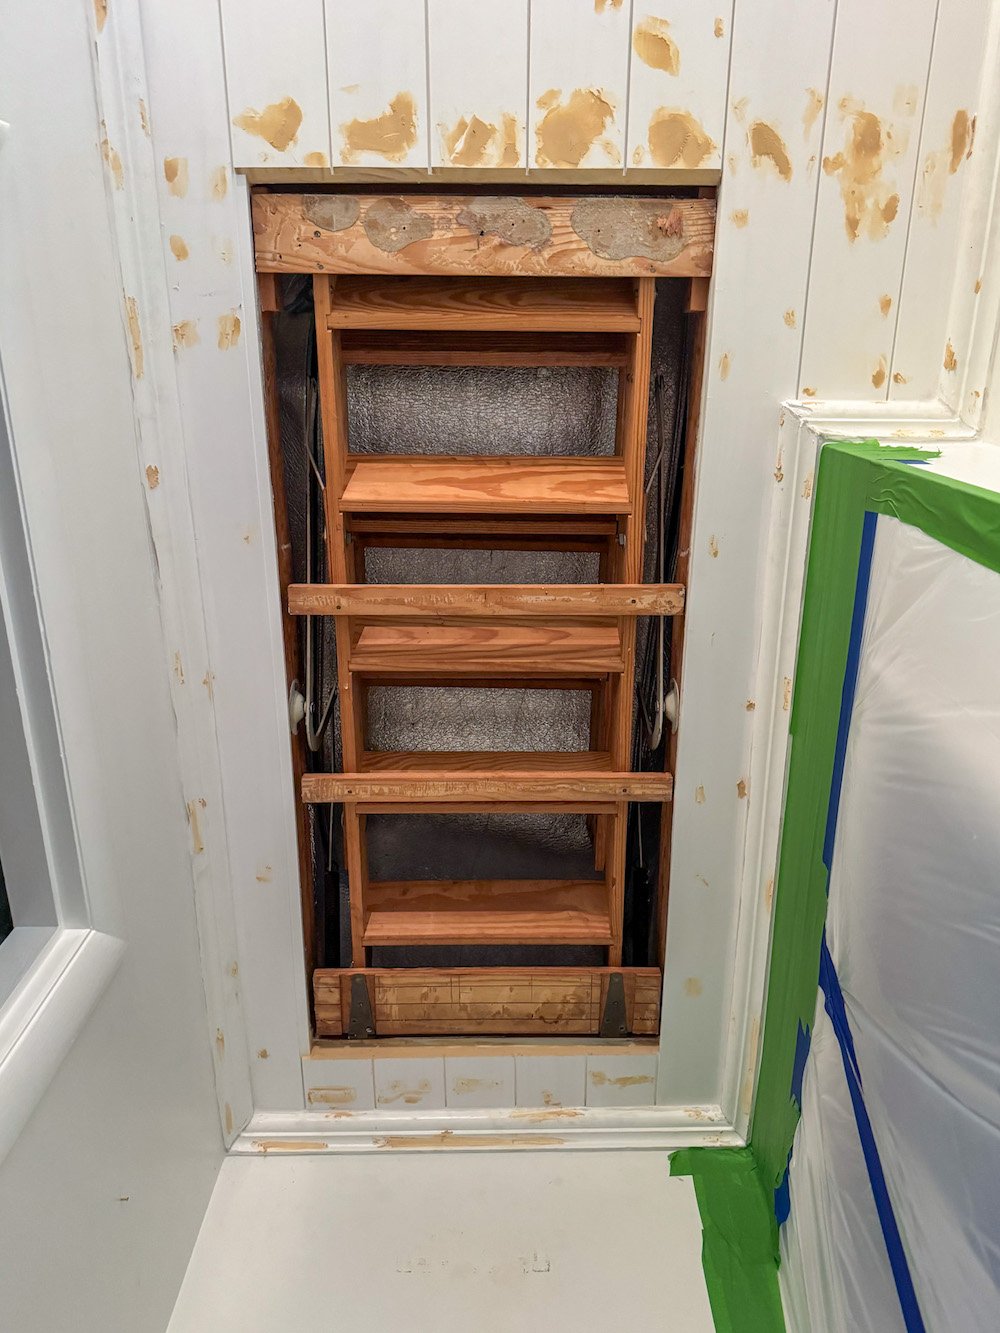
Step 1: Remove the Old Trim, Molding, and Attic Door
Clear the ceiling. We took down the existing attic door panel, trim, and crown molding so we had a clean slate to work with.
Step 2: Measure Your Ceiling + Plan Plank Placement
Measure the length and width of your ceiling to calculate how many planks you’ll need. Use a scrap piece of tongue and groove plank to mock up a layout. Mark the placement with a pencil so you can make sure you’re not left with a super skinny plank along the crown molding or attic door. A little planning here saves major frustration later.
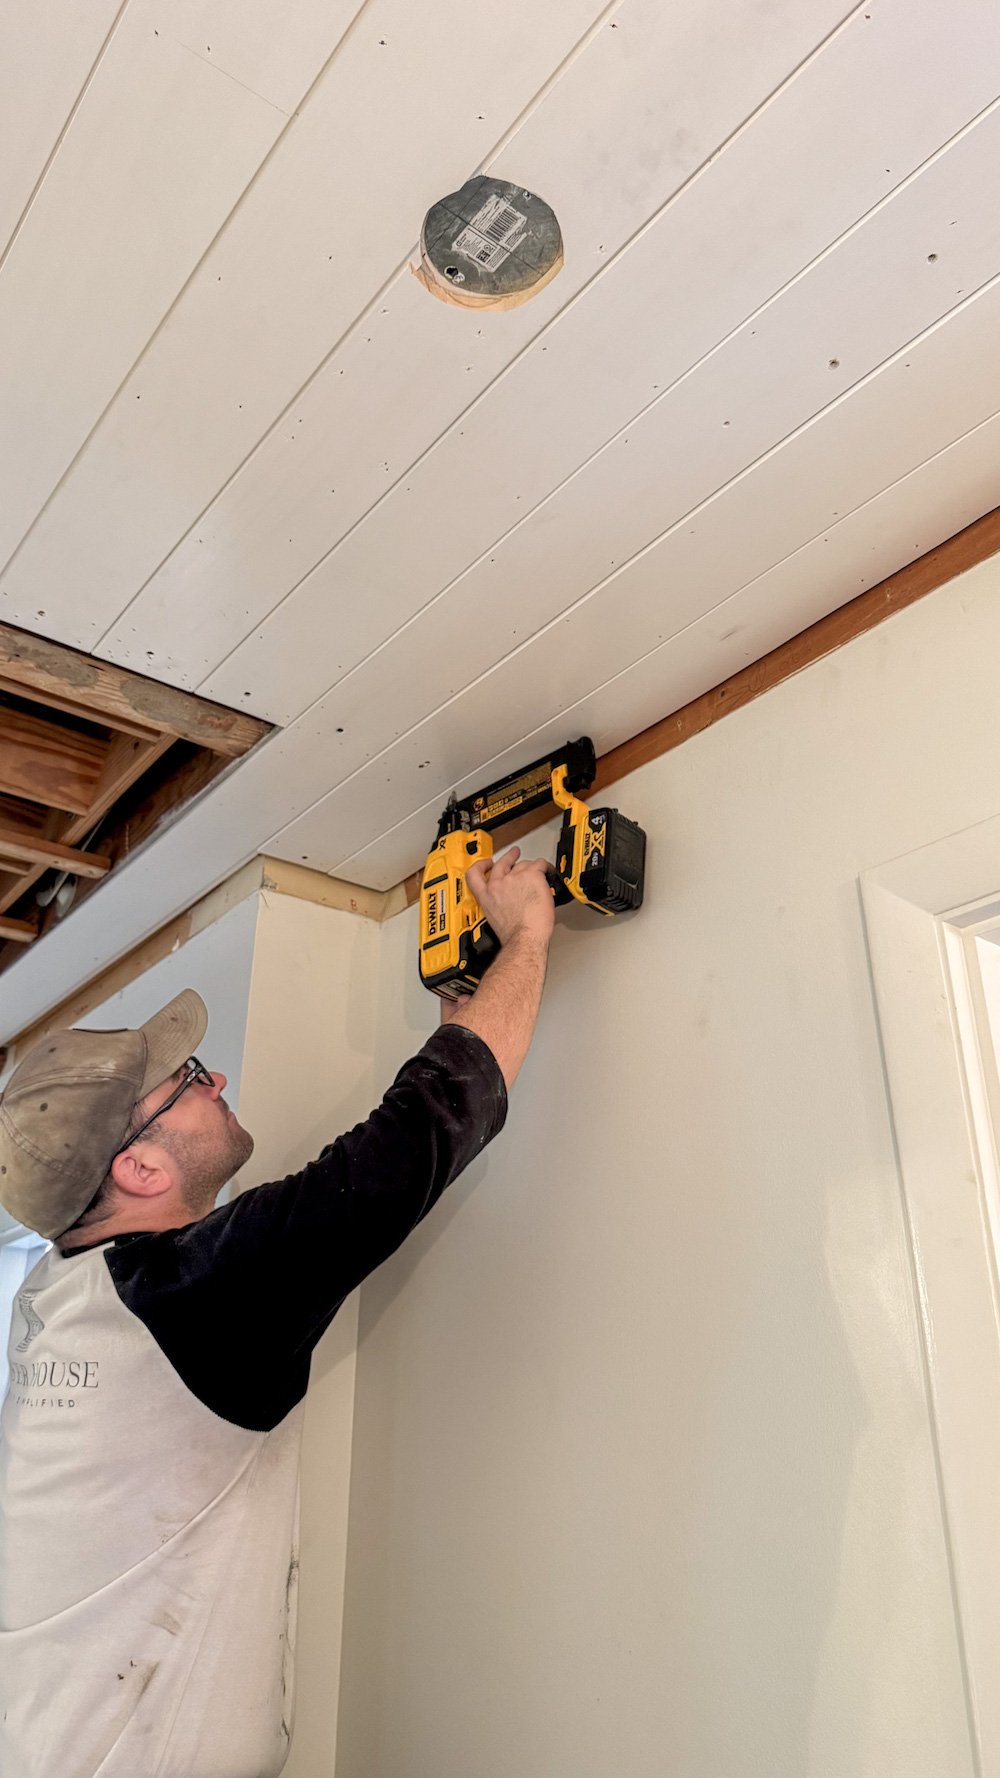
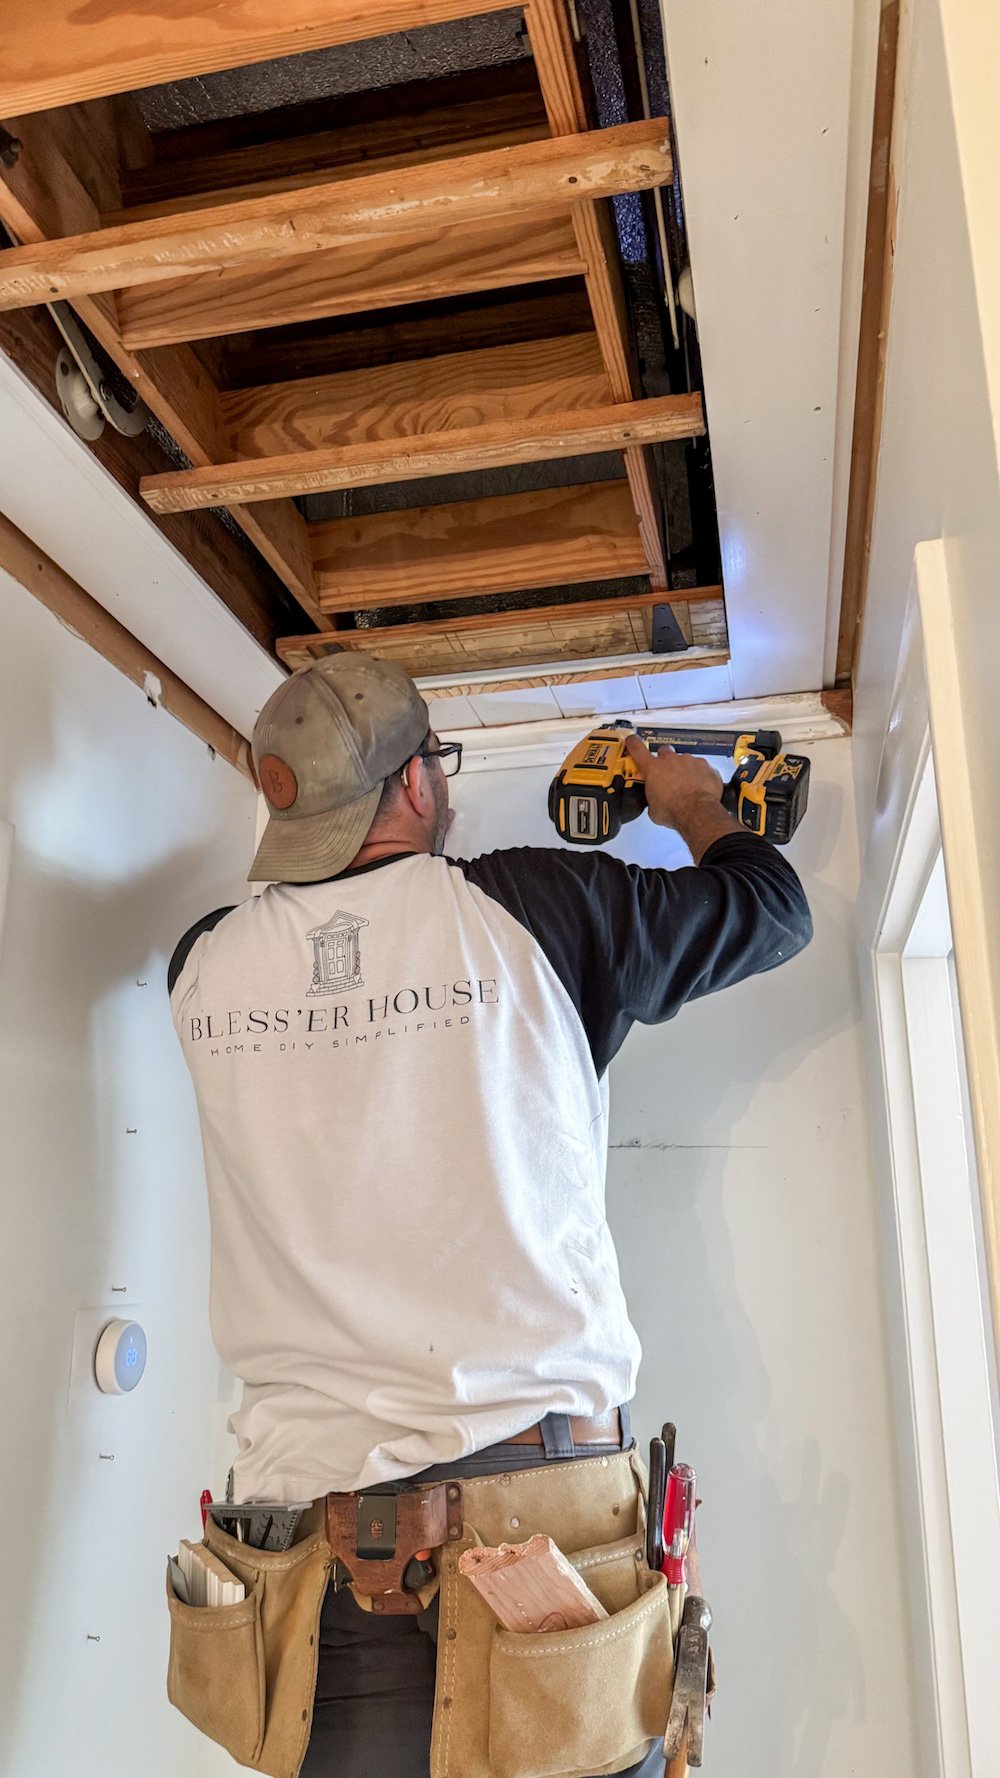
Step 3: Start Installing Planks Along the Edge of the Attic Door
Apply a bead of construction adhesive to the back of your first plank and secure it to the ceiling using 2-inch 16-gauge finish nails. We started along the edge of the attic door opening so the layout would be symmetrical and look seamless.
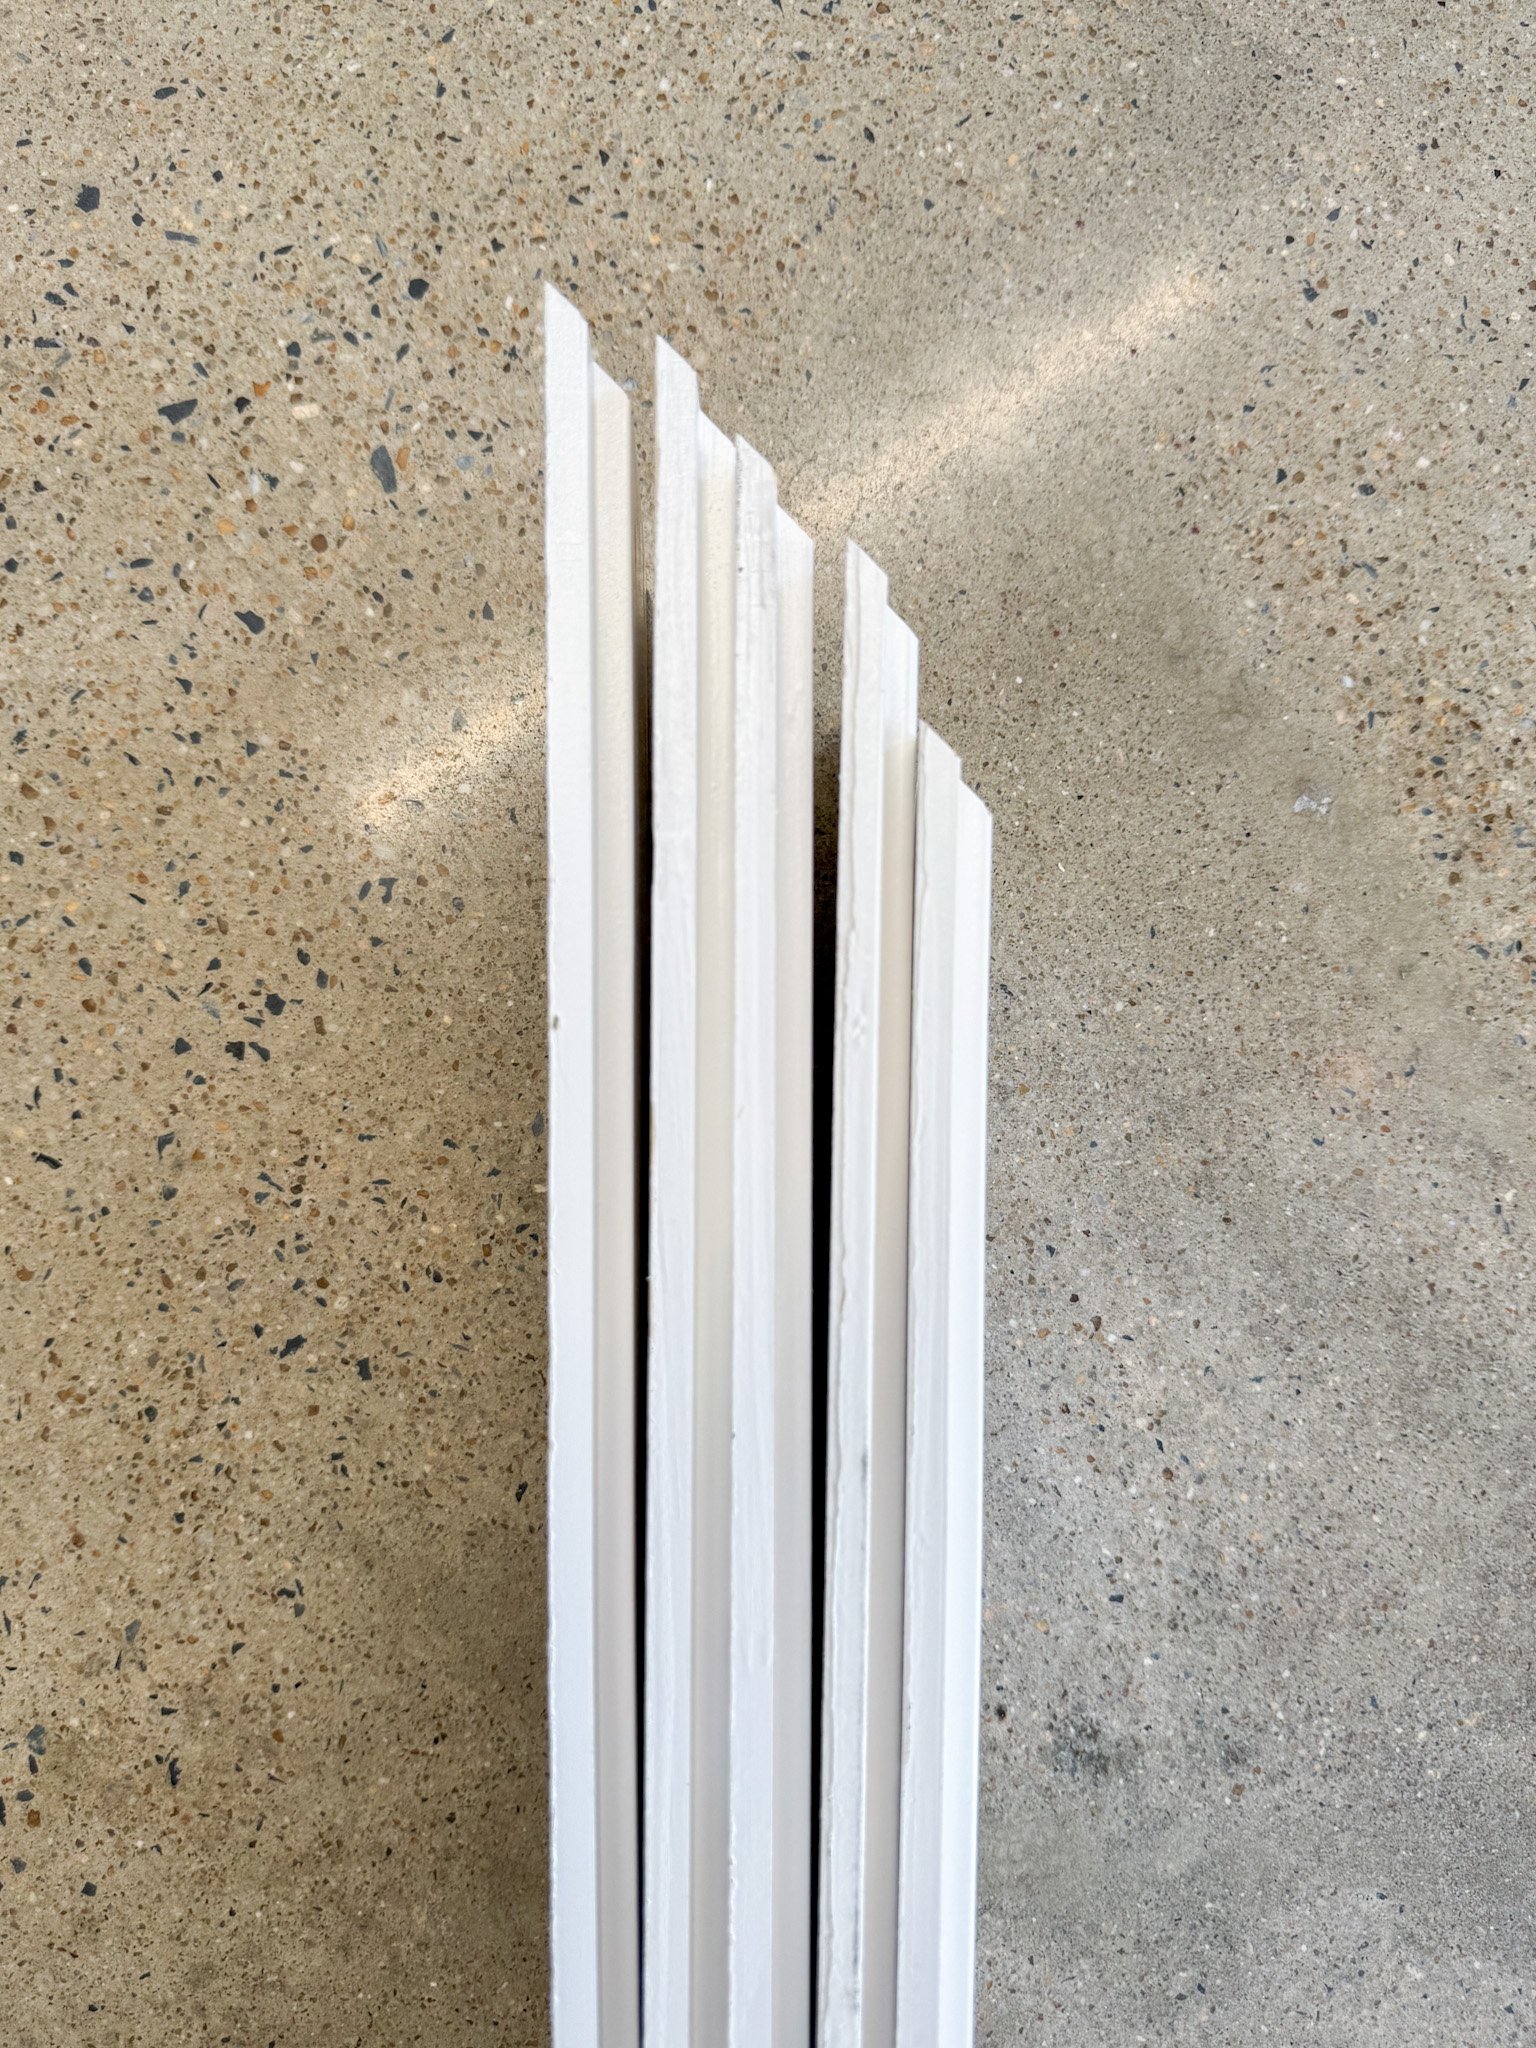
Step 4: Cut the Next Plank at a 45° Angle
Using a miter saw, bevel cut the end of the plank that will meet the attic door at a 45° angle. This will help create a tighter, more polished look around the door and make that seam almost invisible once everything is painted.
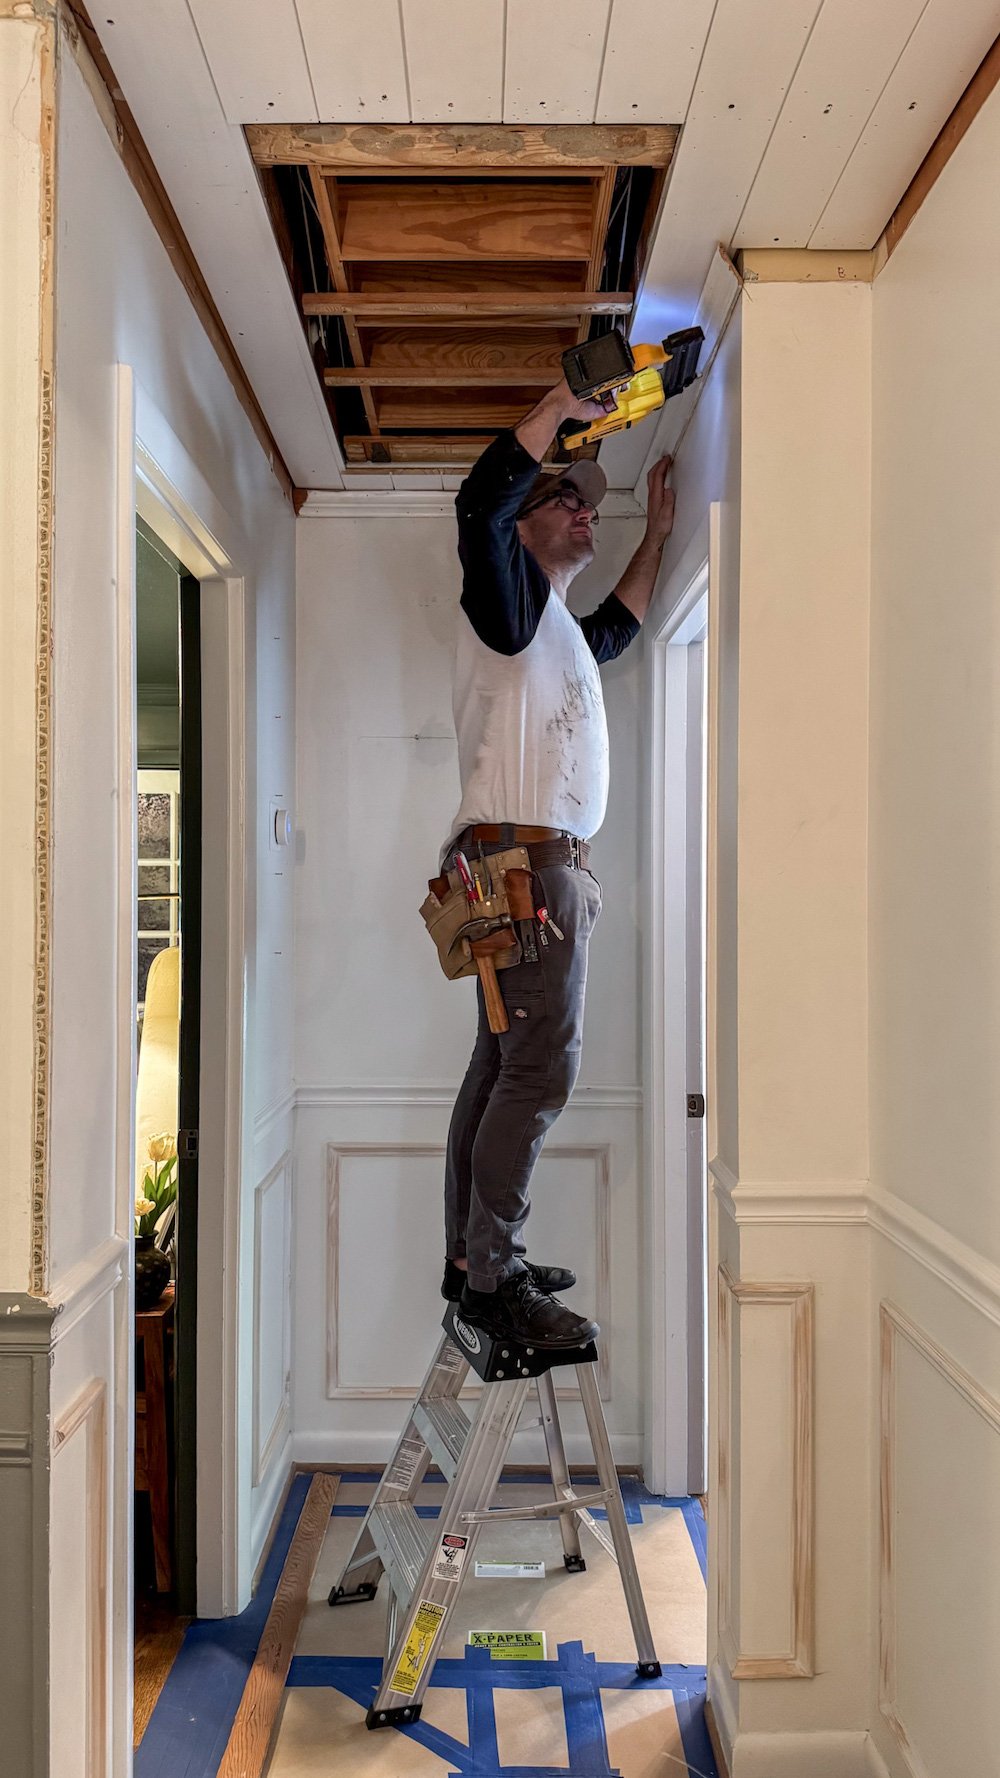
Step 5–6: Continue Installing with Beveled Cuts
Repeat the process, bevel cutting each plank that hits the edge of the attic door at 45° angles. Adhere and nail them in place as you go. The tongue and groove system helps lock them together snugly, making the ceiling look like one continuous surface.
Step 7: Add Crown Molding (Optional)
Once your ceiling is fully planked, you can reattach crown molding around the perimeter. We use a coping saw to get those corner joints just right. If you need extra help with this step, our DIY Picture Frame Molding tutorial walks through the coping process.
Step 8: Cut Planks to Fit the Attic Door
Measure the dimensions of your attic door opening, and cut tongue and groove planks to size. Again, use a 45° angle on the ends that meet the ceiling planks so they align perfectly. This is the part that really makes the door blend in with the rest of the ceiling.
Step 9: Attach Planks to the Attic Door Panel
Use construction adhesive and finishing nails to attach the planks to the attic door. If you have a heavy attic door, make sure your hinges are reinforced to handle the added weight.
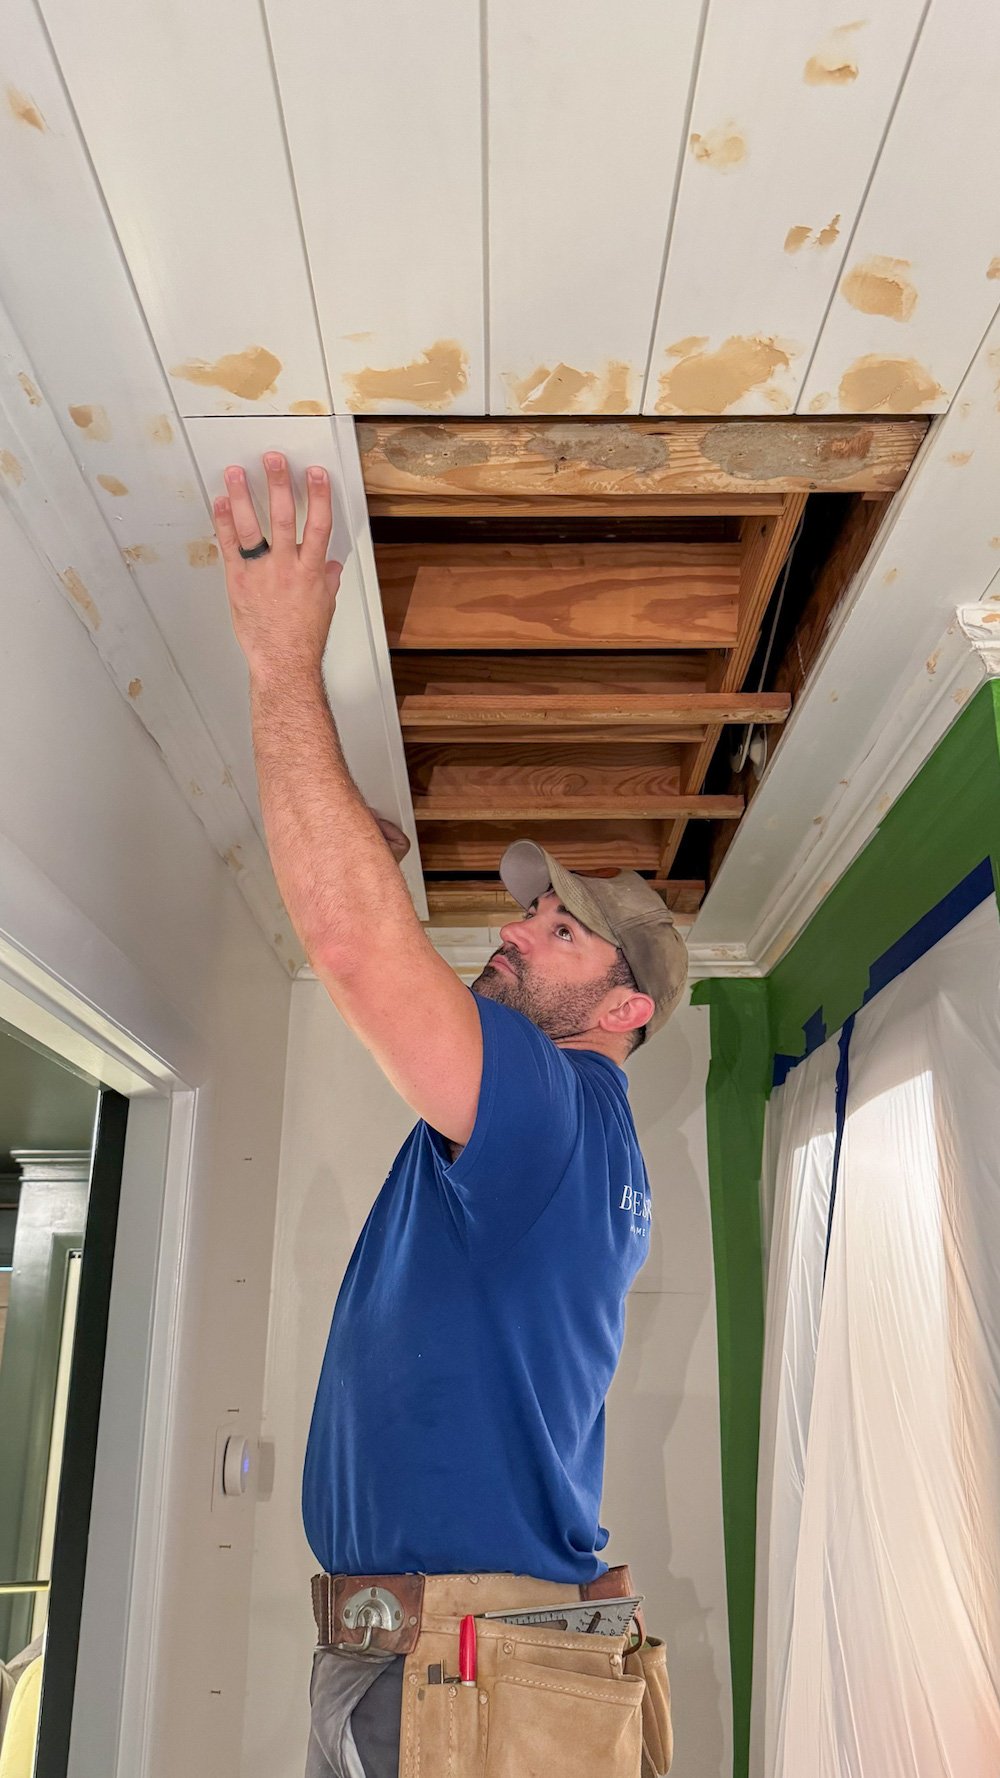
Step 10–11: Fill Nail Holes + Caulk the Edges
Use wood filler to fill any nail holes and seams, and caulk around the crown molding where needed. Let everything dry thoroughly before moving to the next step.

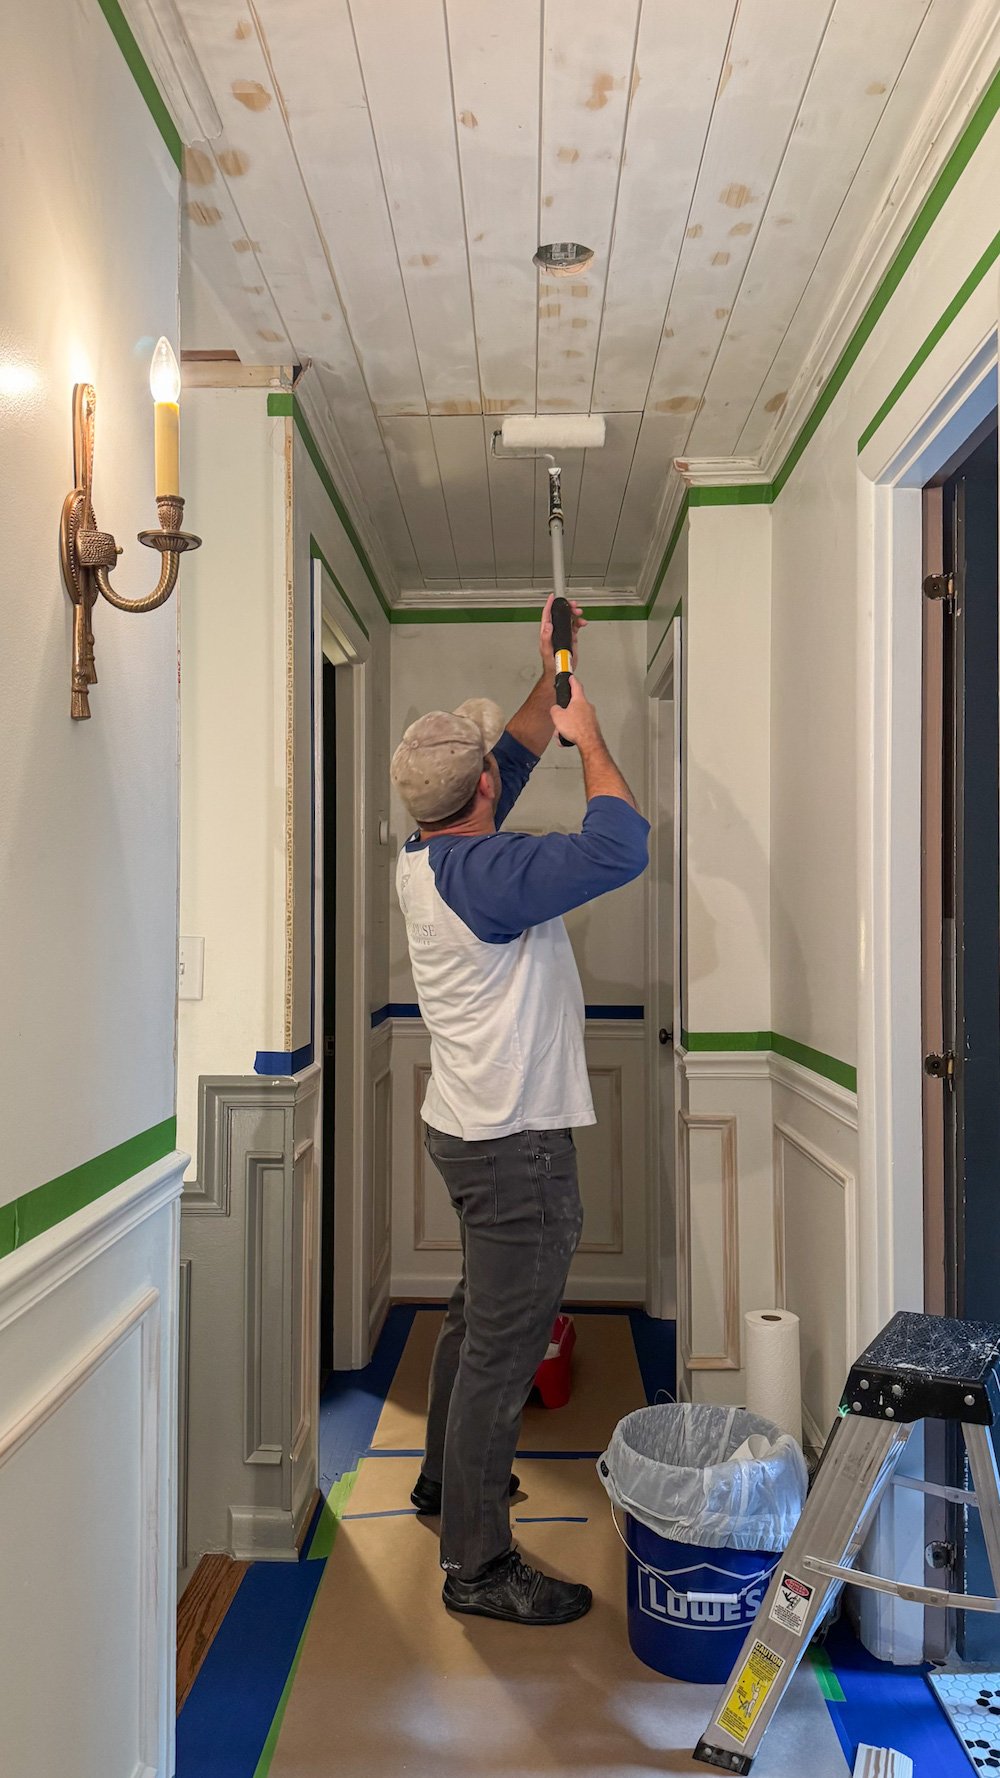
Step 12: Sand, Prime, and Paint
Once your filler and caulk are dry, sand the wood filler until smooth. Then, prime and paint the ceiling (and attic door) in your desired color. We went with a clean white for a crisp, classic look, but I’m not above painting a ceiling in a moody color later. (Never say never.)
Step 13: Replace the String with a Hook & Pull Kit
No more creepy dangling string! We added attic hook and pull kit a few years ago to make the attic door less noticeable, and now that the planks are in place, it blends in perfectly! Now it opens and closes easily without being an eyesore.
Attic Door Before & After
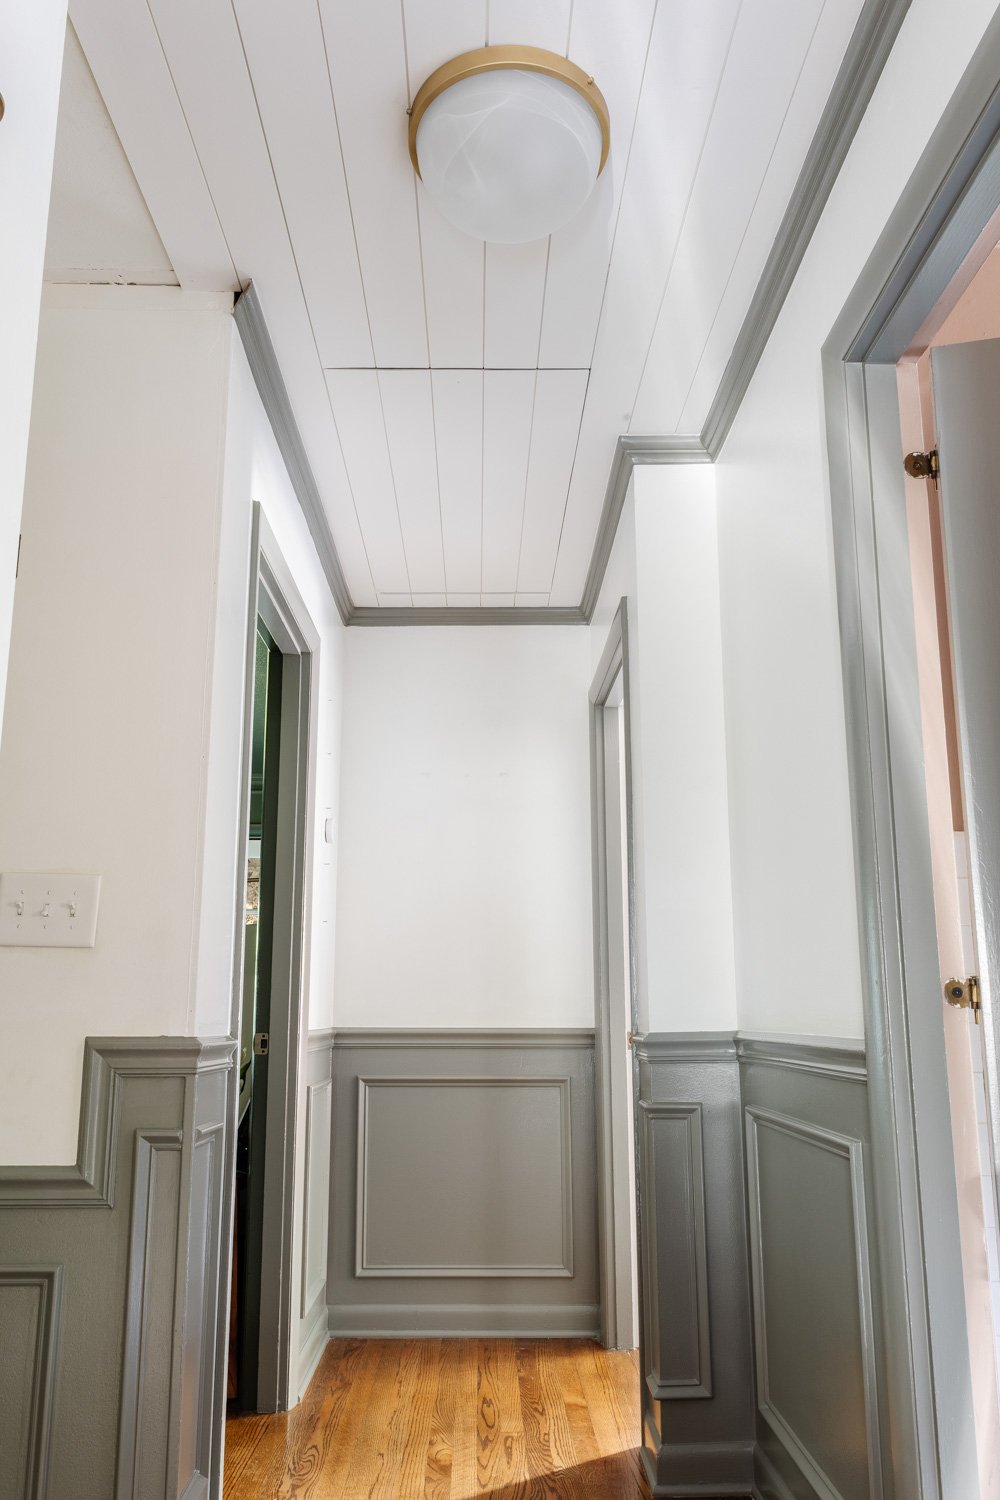
Now that our tongue and groove ceiling is in place and the attic door is completely hidden, our hallway feels taller, cleaner, and way more intentional.
Now we can put our big antique mirror back up, roll out a runner rug to soften the floor, and a little gallery wall moment to bring it all together.
I honestly can’t believe we waited this long to tackle this project. Hiding that attic door was the missing puzzle piece in giving our upstairs hallway the character and charm it was begging for.
Here’s a little peek now that the trim is getting painted. 😉
Have a ceiling eyesore you’ve been avoiding? Let this be your sign to cover it with some good old-fashioned tongue and groove magic.
Let me know if you give this project a try or tag me on Instagram @blesserhouse if you do so I can cheer you on!
More DIY Millwork Ideas


